There are around 347.3 billion emails exchanged everyday. In this digital space, it is important to be able to manage one’s inbox. For Outlook users, Outlook Email Tagging is the best way to do it efficiently. With the sheer volume of emails flooding in daily, it’s easy to lose track of important messages and deadlines.
That’s where email tagging comes in. By implementing a tagging system in your Outlook inbox, you can streamline your workflow, and prioritize tasks.
This guide will walk you through the steps to create tags for emails in Outlook to take control of your inbox.
Why Email Tagging?
Email tagging is a powerful organizational tool that allows you to categorize and label your emails according to their content, importance, or any other criteria you choose.
How Do I Create An Email Tag In Outlook?
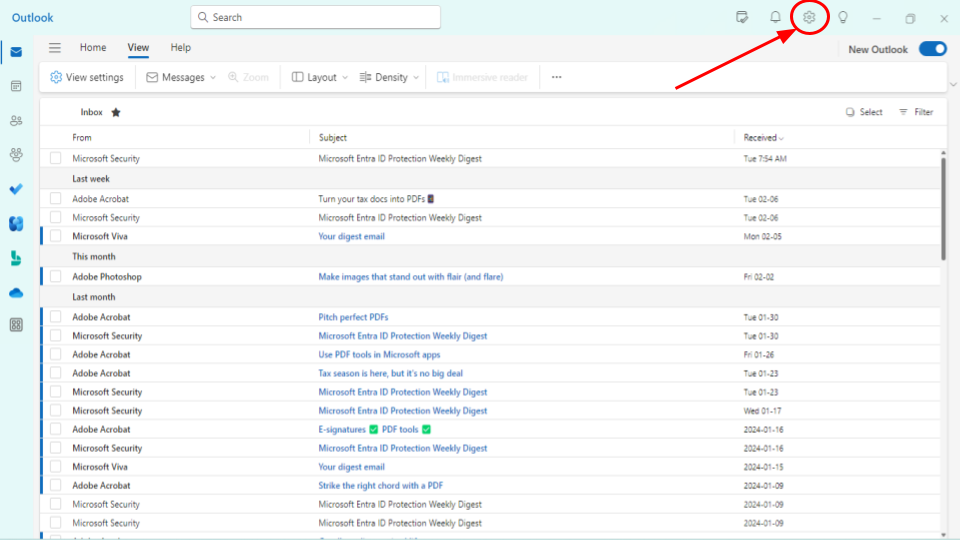
1. Go to Settings in Outlook
Open Microsoft Outlook and navigate to your inbox. Locate the settings in the upper right corner. Click on it.
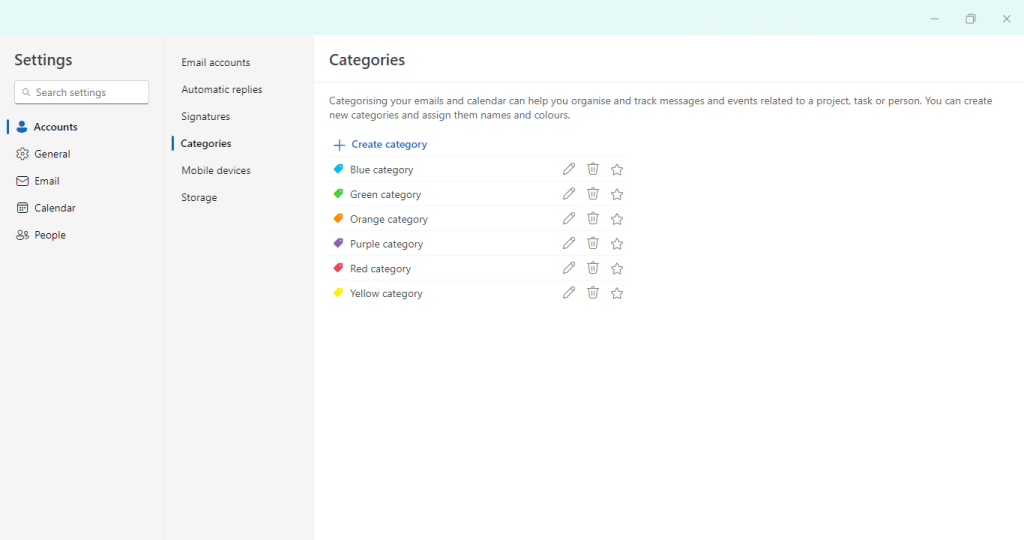
2. Find Categories in Settings
Go to Accounts and click Categories, there you will find Tags with the color names. Click on the pen icon to edit any existing tag. You can either delete any of them by clicking on the Bin button or mark them as favorites by clicking on Star.
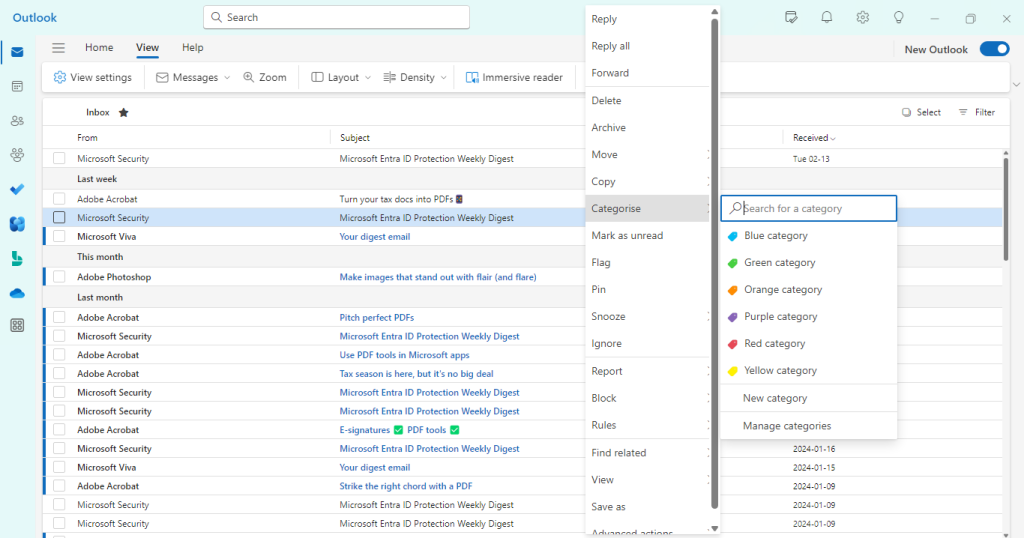
3. Creating a New Tag
Once you’ve selected the desired emails, click New Category to create one. From the menu, choose the option labeled “Categorize” or “Tags” (depending on your Outlook version).
4. Choosing a Tag Color
In the submenu that appears, select “New” or “Add New Category.” A dialog box will appear, allowing you to enter a name for your new tag and choose a color. This color-coding system will make it easier to identify tagged emails at a glance.
5. Assigning the Tag
After naming your new tag and selecting a color, click “OK” to confirm. Now right-click on
6. Customizing Tag Names
To further personalize your tagging system, you can create additional tags for different types of emails, projects, or contacts. Simply repeat the above steps to create as many tags as you need, using distinct names and colors.
How Do I Auto-Tag An Email In Outlook?
1. Create Rule
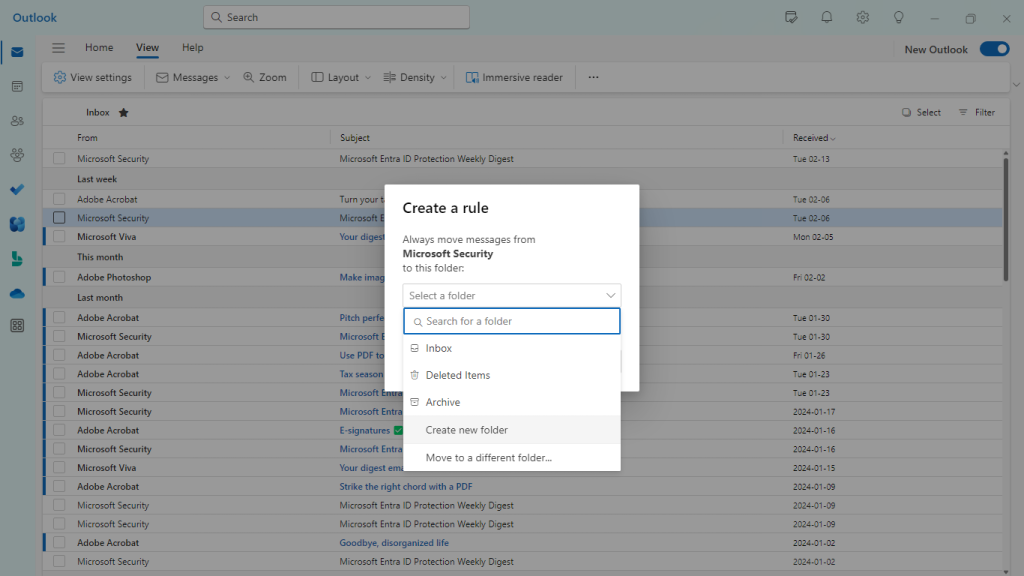
You can enable auto-tag by creating a rule on specific emails. To do this you need to right-click on any email you want to create a rule on, select “Rules” and Click on “Create Rule”
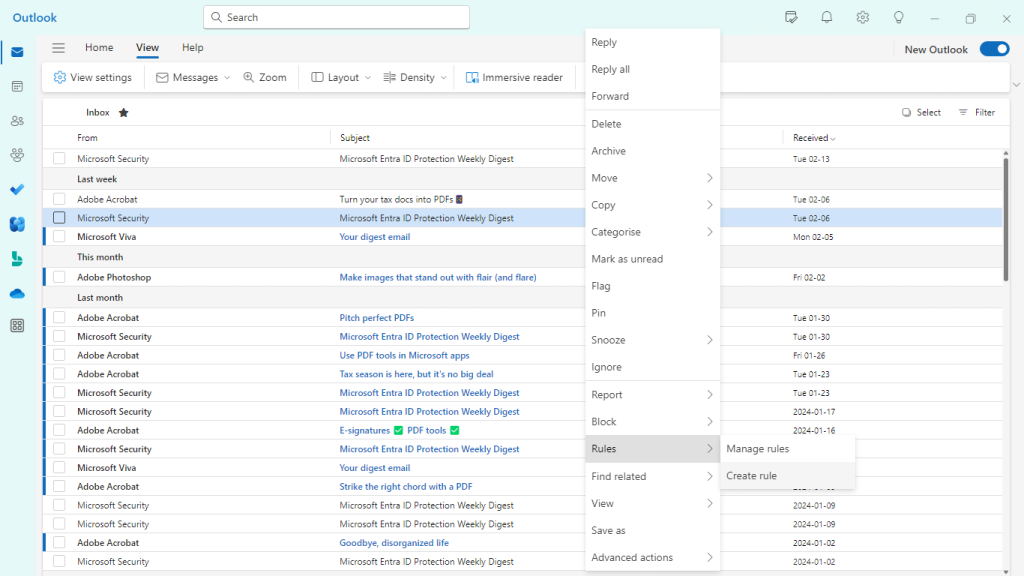
2. Specify Folder for Rules
You can specify any folder you want your email to go automatically to or create a new folder for it.
Best Practices for Email Tagging That Actually Work
Email tags can organize your digital chaos or create an even bigger mess. The difference lies in how you use them.
Most people go overboard with tags, then wonder why their system feels more complicated than helpful. Here’s how to build a tagging system that saves time instead of wasting it.
Keep Your Tags Simple and Laser-Focused
Resist the urge to create tags for every possible scenario. Too many options paralyze decision-making and slow you down.
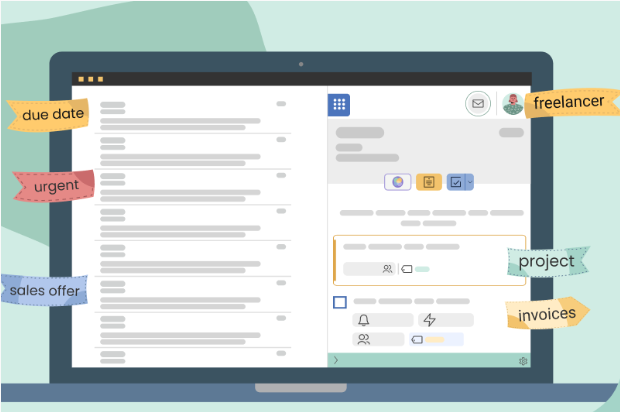
Stick to categories that matter: project names, urgency levels like “Follow-Up” or “Urgent,” and email types like “Invoices” or “Team Updates.” Every tag should serve a clear purpose or it shouldn’t exist.
Make Colors Your Secret Weapon
Your brain processes colors faster than words. Use this to your advantage.
Try red for urgent emails, green for completed tasks, and blue for follow-up actions. Pick colors that feel natural to you and stick with them religiously. Consistency makes your system automatic, rather than exhausting.
Schedule Regular Tag Cleanups
Your business evolves. Your priorities shift. Your tags should too.
Block 30 minutes monthly to review your tagging system. Delete outdated tags, rename confusing ones, and consolidate similar categories to improve organization. A cluttered tag system defeats the entire purpose.
Follow the 10-Tag Rule
Here’s a hard truth: if you need more than 10 tags, your system is broken.
More tags mean more decisions, more confusion, and more time wasted. Focus on broad categories that capture 80% of your email types. Everything else can live in your general inbox without drama.
Get Your Team on the Same Page
Individual tagging systems work great until you need team collaboration. Then chaos erupts.
Create simple tagging guidelines that everyone understands. Document what each tag means and when to use it. Consistent tagging across your team makes shared inboxes actually functional.
Automate the Boring Stuff
Stop manually tagging repetitive emails. Your email client can handle routine categorization automatically.
Set up rules for client updates, reports, newsletters, and other predictable email types. Automation handles the mundane work while you focus on emails that actually need your attention.
Conclusion: Outlook Email Tagging
In conclusion, implementing an email tagging system in Outlook can revolutionize the way you manage your inbox. By following the steps outlined above, you can create custom tags for your emails and streamline your workflow with ease.
Frequently Asked Questions
1. What is Outlook Email Tagging?
Email tagging is a versatile organizational method that helps you sort and label your emails based on their content, urgency, or any other custom criteria you define.
2. Can I create an auto-tag in Outlook email?
Yes, you can create an auto-tag by creating a rule for specific emails. Then just assign specific folders for these rules.
3. How does Outlook Email Tagging Help?
Outlook email tagging helps by allowing you to categorize and organize your emails more efficiently. You can assign tags based on content, urgency, or custom criteria, making it easier to find important messages, prioritize tasks, and streamline your workflow.